Thanksgiving is just around the corner and what better way to celebrate than by drawing a festive turkey? Whether you’re an experienced artist or just looking for a fun holiday activity, drawing a turkey can be a creative and enjoyable process. With a few simple steps, you can create a cute and whimsical turkey drawing to add some holiday cheer to your home.
Before you begin drawing your turkey, gather all the necessary materials. You will need a pencil, eraser, paper, and some colored pencils or markers to add a pop of color to your drawing. Once you have everything you need, find a comfortable workspace where you can let your creativity flow.
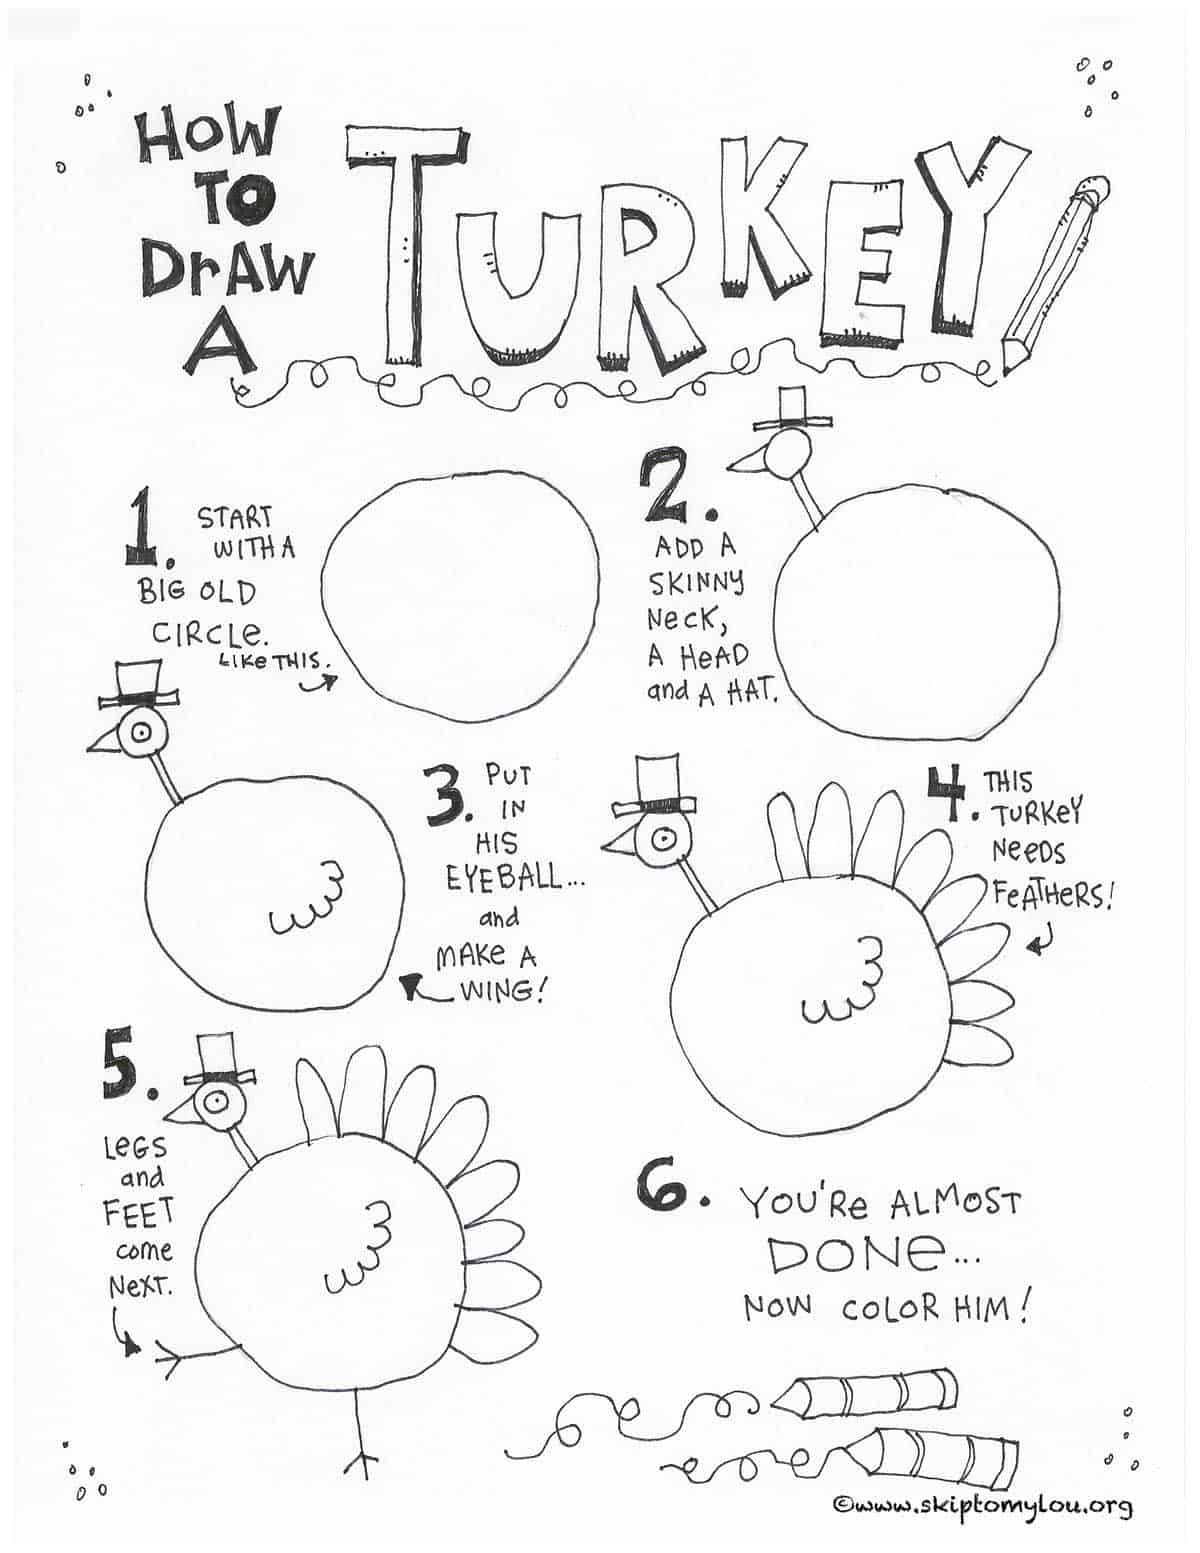
Start by drawing the turkey’s body, which is a simple oval shape. Next, add a small circle for the head at the top of the oval. Then, draw two small circles for the eyes and a triangle shape for the beak. Add a wattle (the red dangly bit under the turkey’s beak) by drawing a small, curved shape under the beak.
Next, it’s time to draw the turkey’s feathers. Begin by drawing a series of curved lines around the body of the turkey to create the appearance of feathers. You can make the feathers as detailed or as simple as you like, depending on your artistic style. Don’t forget to add some texture and shading to make the feathers look more realistic.
Once you have finished drawing the feathers, add some details to the turkey’s face and body, such as small lines for the wings and feet. You can also add some fun accessories, like a pilgrim hat or a bow tie, to give your turkey some personality. Finally, color in your turkey using your colored pencils or markers to bring it to life.
In conclusion, drawing a turkey can be a fun and rewarding activity for Thanksgiving. With a few simple steps and some creativity, you can create a festive turkey drawing to add some holiday spirit to your home. So gather your materials, find a cozy spot to draw, and let your imagination soar as you create your very own Thanksgiving turkey masterpiece!
