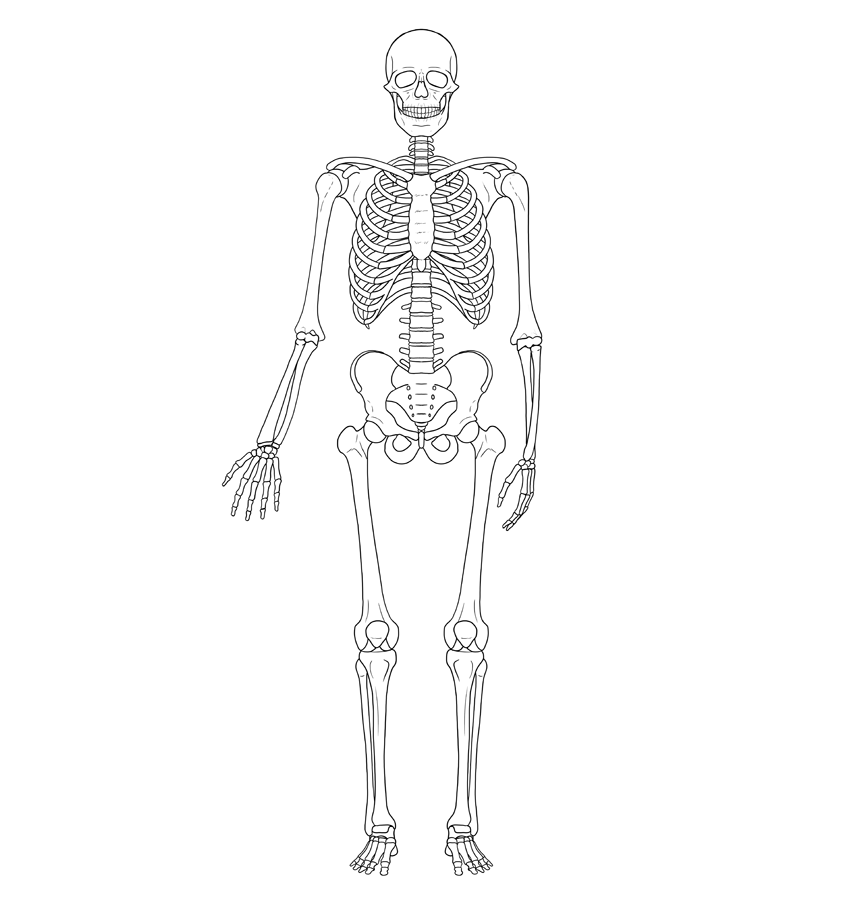
Are you looking to learn how to draw a skeleton but not sure where to start? Drawing a skeleton may seem intimidating at first, but with some simple tips and tricks, you can easily create a spooky and realistic skeleton drawing. In this article, we will guide you through the process of drawing a skeleton step by step.
Whether you are an aspiring artist or just looking for a fun Halloween project, drawing a skeleton can be a rewarding and enjoyable experience. With some practice and patience, you will be able to create a skeleton drawing that will impress your friends and family. So let’s get started!
Step 1: Sketch the Basic Shape
The first step in drawing a skeleton is to sketch out the basic shape of the skeleton. Start by drawing a simple stick figure outline of the skeleton’s body. This will help you visualize the proportions and positioning of the skeleton’s bones. Don’t worry about getting it perfect at this stage, as you can always make adjustments later on.
Next, add in the details of the skeleton’s bones, such as the skull, ribcage, arms, and legs. Use light, quick strokes to outline the bones, focusing on capturing the basic shapes and angles. Remember, skeletons are made up of long, slender bones, so keep this in mind as you draw.
Step 2: Add in the Details
Once you have sketched out the basic shape of the skeleton, it’s time to add in the details. Start by adding in the smaller bones, such as the fingers and toes. Pay close attention to the joints and angles of the bones, as this will help give your skeleton drawing a more realistic look.
Next, add in any additional details, such as the eye sockets, teeth, and spine. These small details will help bring your skeleton drawing to life and make it more visually interesting. Take your time with this step and focus on capturing the intricate details of the skeleton’s bones.
Step 3: Shade and Add Depth
Once you have added in all the details of the skeleton, it’s time to shade and add depth to your drawing. Start by shading in the shadows of the skeleton’s bones, using a light touch to create a realistic look. Pay attention to the light source and add shadows accordingly to give your skeleton drawing a three-dimensional appearance.
Finally, add in any final touches, such as highlights and textures, to enhance the realism of your skeleton drawing. Take a step back and admire your work, making any final adjustments as needed. Congratulations, you have successfully drawn a spooky and realistic skeleton!
In conclusion, drawing a skeleton may seem challenging at first, but with some practice and patience, you can easily create a realistic and spooky skeleton drawing. Follow these simple steps and let your creativity shine. Whether you are a beginner or experienced artist, drawing a skeleton can be a fun and rewarding experience. So grab your pencil and paper, and start drawing your own skeleton masterpiece today!
